
The restoration of a bayonet by electrolysis.
In this example, we will see how to clean a rusty bayonet with an electric process.
As often, bayonets that you buy in flea markets, gun schows and by other ways show some degradation or rusty condition that only electrolysis can treat.
This method will be discussed here.

I am using a successful method for years.
These operations require special care and control.
I take a maximum of attention with the destruction of the rust
and to prevent the risks to be hurt (not to smoke because of the
hydrogen release, wearing gloves and more...)
This will bring you satisfaction !!!
We have to watch carefully the bayonet to determinate the best cleaning method. Just look at the rust surface !!.

In these 2 pictures left and right the rust is very superficial : (click on photos for details).
The scabbard seems blue with a rusted surface and a few scattered rust patches.
It will be treated by the same way that the previous 84/98 sheath. You can use a file, steel wool and oil, click here.
First of all we have to watch the evolution of the rust. This is very important to know if the rust goes inside or outside the steel. Like that we can choose best finishing.
The power of the electrolysis is such that if the rust is growing inward, we have a surface which show some craters when a simple cleaning, maybe long, would have given a better result. The craters would be filled and the rust would be neutralized by the oil.
Here the rust seemed to expand outward. I chose electrolysis to clean the surface without effort and with absolute precision. The result is close to the original condition.
The manual cleaning method is long and tedious. It is not my prefered method because of the interaction with the metal surface. It easily leaves traces of machining and it is possible to dammage an angle or the length.
I also stated that electrolysis doesn’t suit to clean the scabbard. Even if the blue treatment of the steel during the years 1900-1920 is stronger than during the years 1930-1945, it does not resist to electrolysis which discolours this scabbard.


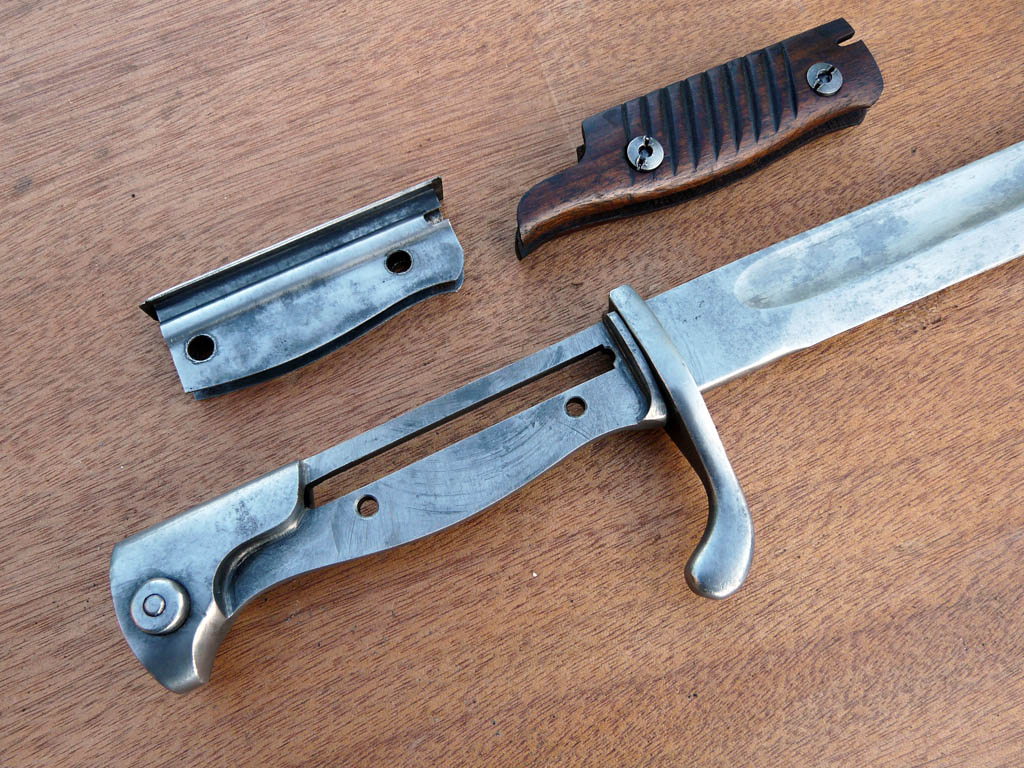
The choice of the electrolysis is done. We will remove the wooden grips which are vulnerable in the electrolyte solution.
Those were often treated and permeable to water.
Electrolysis alter the colour of these grips so it will try firstly to remove the screws.


Before buying a rusty bayonet, I always look at the condition of the blade. Usually, I choose a blade not too rusty.
It presents some rust patches but they are not very important. I will focus on the body of the bayonet less sensitive than the blade.

I use a plastic container. An electric transformer provides power with low electric power (<500 mA) to control fairly easily the removal of the rust.
For the anode, I choose a stainless steel plate depending on which material the bayonet is made.
Then a few home-made accessories to suspend the bayonet.


During the time of preparation of the electrolyte solution, I soak the screws with oil before to remove them..I put the anode on the steel plate and I suspend the cathode in the solution.
I pour about twenty litres of water and I add the soda crystals (1 to 2 tablespoons for 2 L of water).
To release the screws from a 98/05 bayonet, it is important to choose a screwdriver with a large slotted blade.


To avoid shifting and not to leave deep traces on the slots lips, I maintain strongly the handle and I press on the handle of the screwdriver.
If it is not possible to release them. We completely immerse the handle in the electrolyte solution. We have to take care to protect the grips with a special grease.
A 2nd layer of oil is required for the 2nd nut.
.


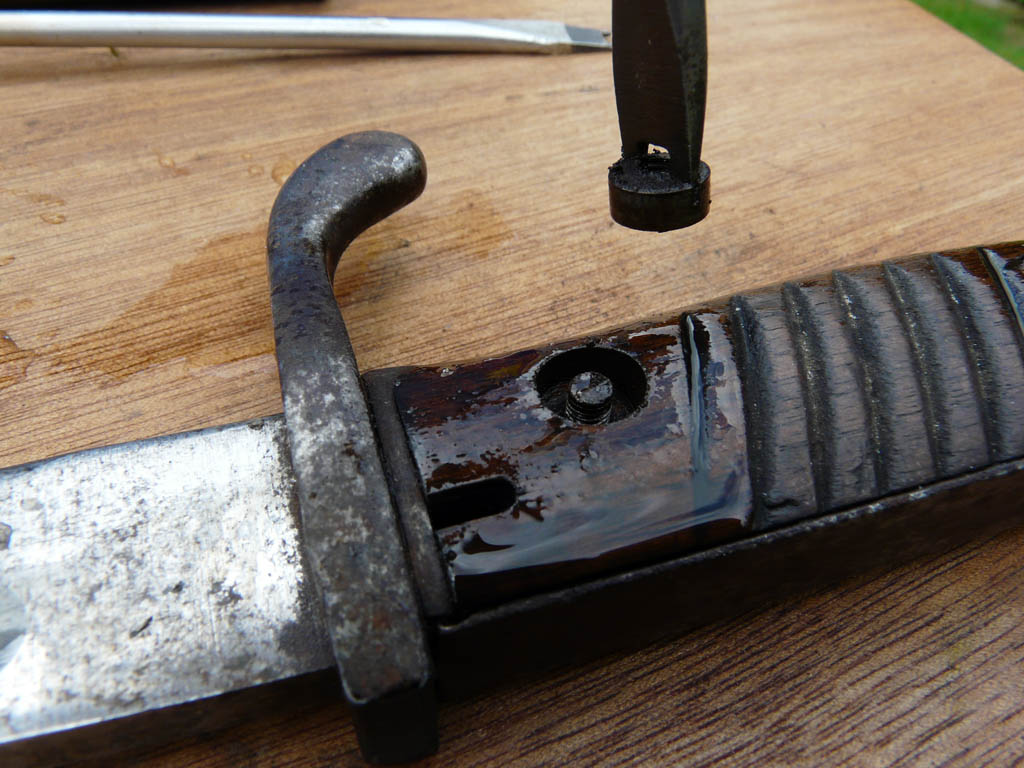
I use a tool to remove the grips. I rarely get out the bolt of this grip.
Indeed the bolt head is serrated and often blocked in the wood. If you try to remove it you may split the wood. You have just to use a small drill with a steel threads brush.


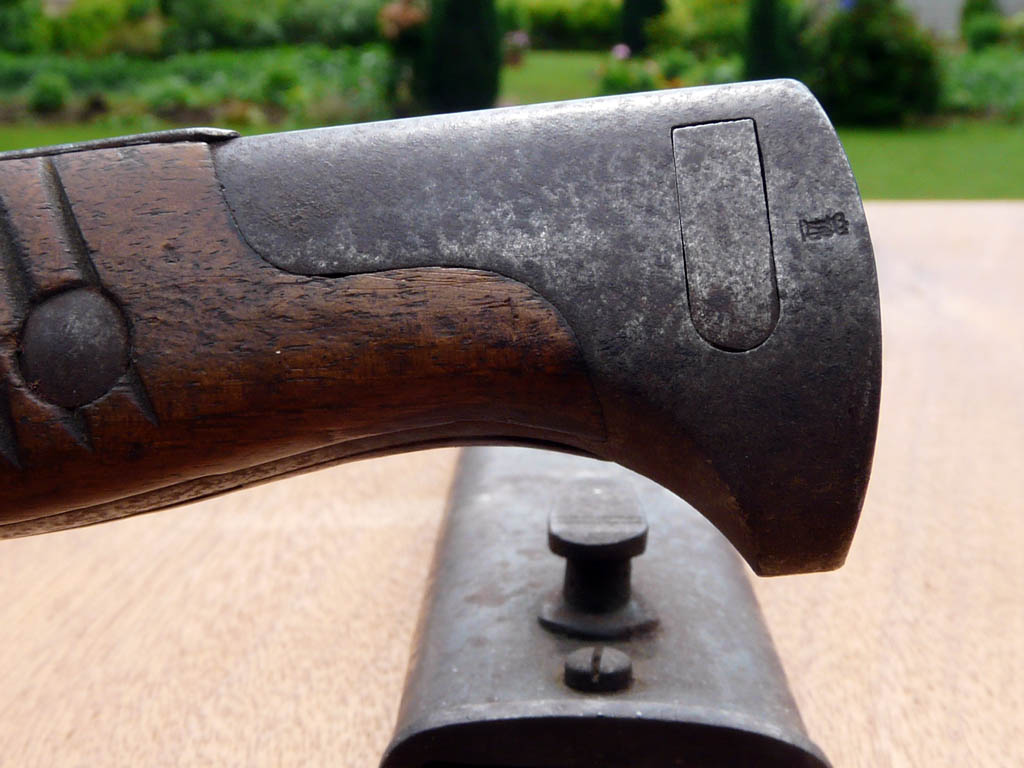
The dismantling of the flashguard shows us it was time to stop the oxidation which is still very active.
We can notice that the flashguard has been modified from the period.
Now we can immerse the bayonet in the electrolyte and during electrolysis we will clean the bolts and grips.

It is specially recommended to wear of gloves if you don’t want to hurt your skin !!!!.
I suspend the bayonet with a wire which is used as a cathode. This bayonet is a little bit larger than other 98/05 so I stuck it without touching the steel plate.
The cathode is just put on steel handle.


The production of hydrogen bubbles at the cathode allows for removing rust spots. It is very fast.
It is necessary to work in a ventilated room or outside would be better. We notice some bubbles of oxygen at the anode.
The electrolyte solution made with soda crystals, sodium carbonate Na2CO3, sodium hydroxide NaOH will gradually become muddy and rust particles will fall to the bottom.


The caustic soda is an excellent cleaner and degreaser.
Soda crystals have similar qualities but certainly less powerful enough to remove the paint so it is strictly forbidden to put an ersatz bayonet in electrolyte solution because of the green paint.
We check the start of the removal of rust because an electrical mistake would be catastrophic.


In this kind of superficial cleaning, we don't have to use electrolysis for a long time because it would damage the springs in the handle even if it is enclosed and protected and that the electric power is very weak.
We can estimate that approximately 2 hours are enough. The time to clean the nuts and the scabbard with a soft steel threads brush.


It is quite fascinating to see some patches of rust to come unstuck.
I regularly get out the parts and I scratch the surface of the flashguard and of the hilt with the thumb to check the removal of the rust.
After cleaning the nuts, I get out my parts and I dry them with compressed air.


Once dried, I use the usual methods of cleaning : steel wool soaked with a polish product, rotating steel threads brush with WD 40 oil.
Then I wash it with a sponge soaked with dish soap and a I dry with a cloth.
We can now see some interesting manufacturer markings on the sides of the crossguard.


Marking SS is not a reissuing during WWII.
We clean the tang with a small rotating steel brush.
Finally we clean the blade with a polish product and we soak with oil.
The bayonet is now clean. We can compare before and after cleaning. It is suprising.


The bayonet is still in its original aspect, not to clean and not to
bright.
The last picture shows the bayonet with its frog and a knot (5th company).
To find it in the table of 98/05 bayonets, you can click here.
