
The restoration of a twisted and swollen 84/98 third type scabbard
When I visited at a friend collector, he shown me an amazing 84/98 bayonet scabbard.
I was surprised to see the condition it was.
Also, I undertook the repair of the scabbard to try to make it as close as its original condition.


He lent me an object that the Germans used to hit their scabbards which were often damaged in wartime. We can therefore observe a concave bump on each side without a large fold in the length. What is amazing is the swelling of the iron sheet at the end of the scabbard !!.

In this page we will see that there are opportunities to remove the bumps and also to get the original shape where it is swelled. (click on pictures for details) .
I am going to start to remove the swelling and to flatten it on a uniform length.
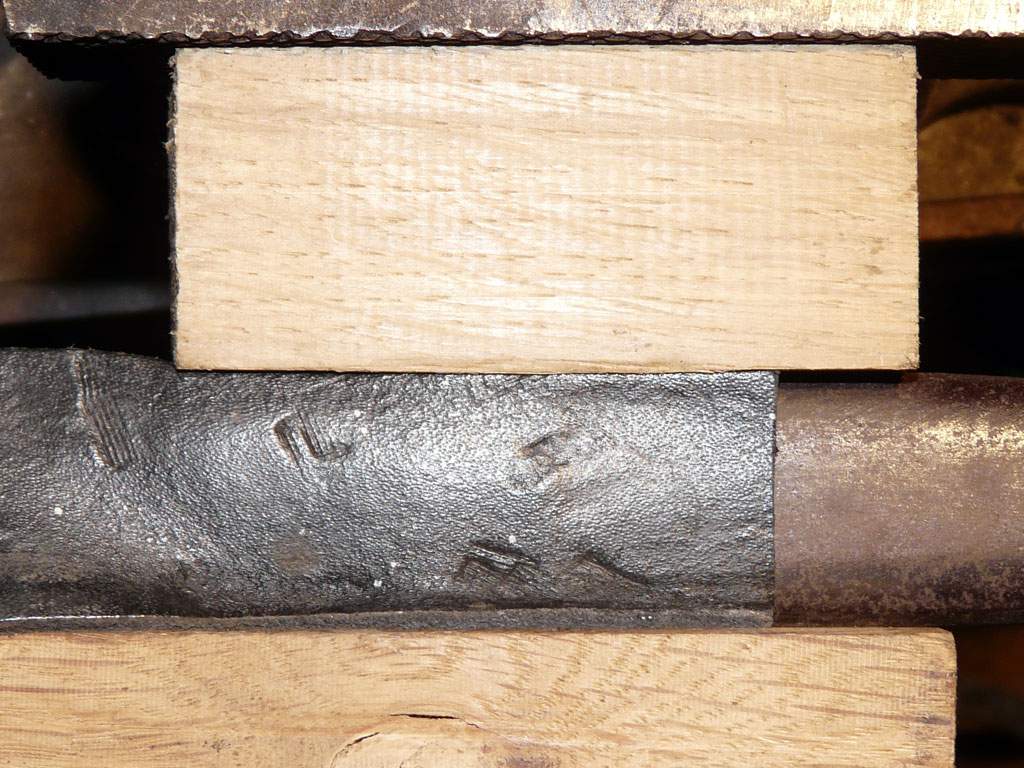
I secure the scabbard between two pieces of oak.
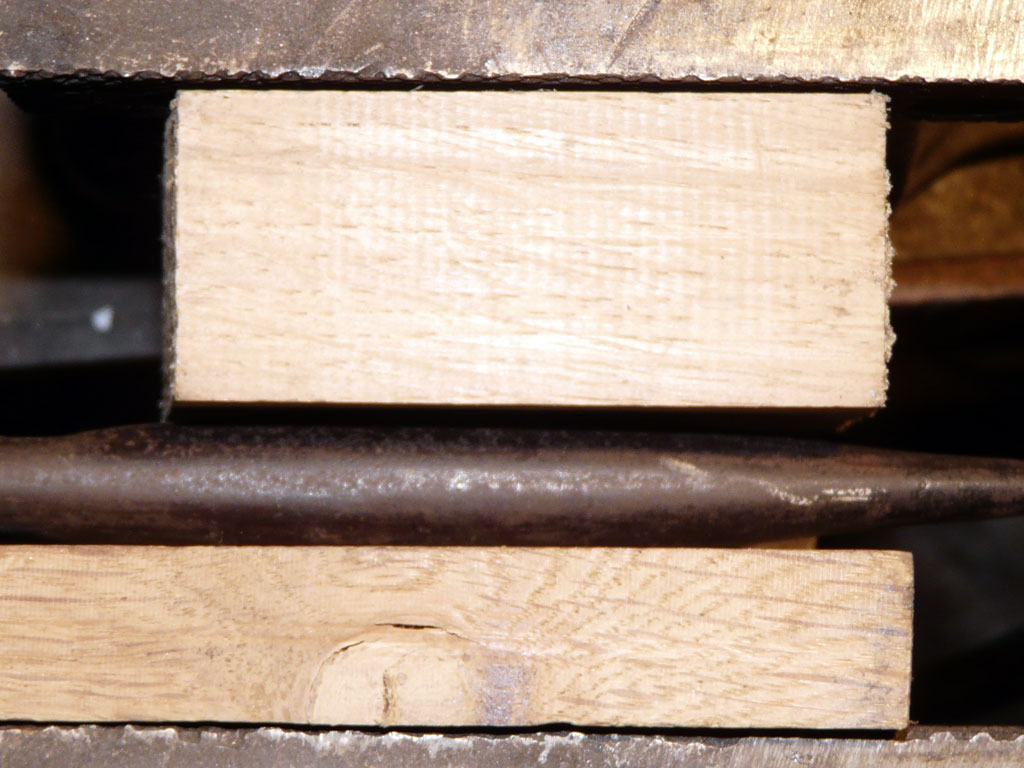
I use this method because the swelling seems to be uniform when looking at the scabbard. Then I tighten gradually jaws of the vise to a position where the scabbard makes a loud banging.
At this time, the scabbard get back its original shape, a kind of flat oval. We can see that the metal has a kind of memory and now everything get sorted without parasite strain. It is not necessary to rework it with various tools !!.


Sometimes the crack does not happen and we have to take care not to over tighten on both sides which could be deformed rapidly in the opposite way.
In the longitudinal direction, the sleeve has regained its flatness !!.

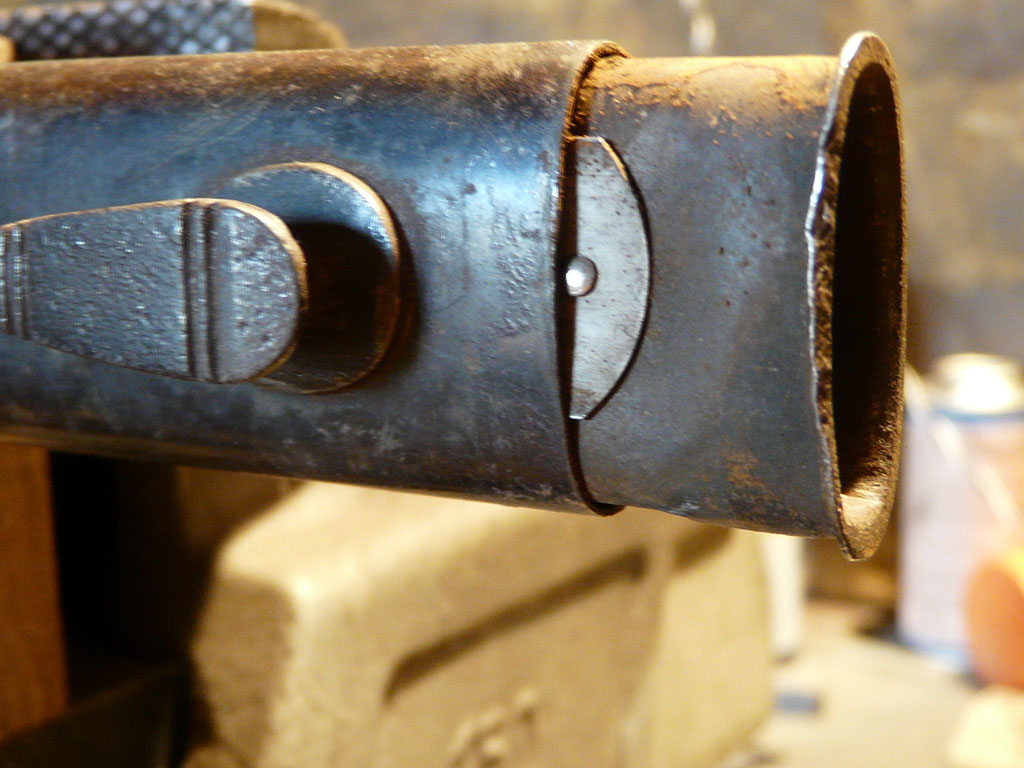
Now we see that the bump which is pressing into the scabbard divides it as a V-shape.
At first, we'll try to straighten it by tapping the extremes in the opposite way, then in a second step we will try to remove the bumps with the mandrel.


But before that, we must remove the springs. As it is rusty, I use an old wood chisel not sharp and I tap carefully.
As it progress, I change the side to tap not to distort it too much !!.
Before, we will spot the defects such as the deformation of the lips here !!.


I put the scabbard between the jaws and then I hit on the extremities to slowly bring the scabbard to a straight position.
Then I maintain the mandrel with the vise. It will permit to remove the bump carefully with a rubber mallet !!.
A piece of leather will allow to tap on the periphery of the bump.


Subsequently I alternate a regular crushing between oaks jaws and some blows with a rubber mallet.
The idea is to shape the steel sheet as a bodybuilder.
The best thing is to control the crushing of the sides between the jaws of the vise and hit the bump with the mallet to get as close as possible to an elliptical shape.

Once the result reached, I remove the mandrel from the scabbard. In many cases, everything is stuck because of the operations of removal of the bumps.
I carefully tap with a piece of wood to avoid the risk of desoldering the frog stud. Then I hit the edges of the scabbard and I clean with a brush.


The springs are also cleaned. The rust heavily corroded the steel.
At this point, I just straightened the edges of the piece that maintains the springs.
I always secure it between oak jaws.
Then I carefully reform the edges on the steel vise with a plow tip.


Then we put the springs inside the scabbard. Before you have to lubricate the inside of the scabbard.
We also have the opportunity to sand.
Dont forget to clean the threads of the side screw !!.
Now the scabbard is repaired and presentable !!.


